

The e-commerce industry has grown considerably in recent years. The COVID-19 pandemic has undoubtedly accelerated the trend of people gravitating toward online shopping. But it's not just the number of people shopping online that has increased; there are also more shops and competition. So, if you want your products to stand out from the crowd, you need excellent ecommerce product photos.
In e-commerce, the product photography is crucial. 93% of consumers say that visual appearance is the key factor in purchasing. In another survey, 90% of respondents said that the quality of images influenced their purchase.
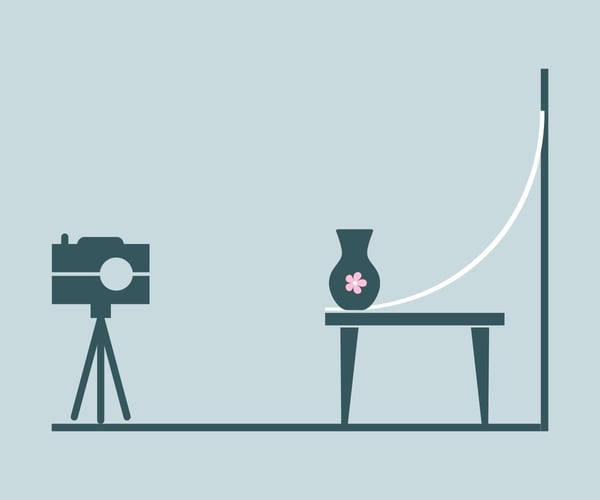
Taking great product photos doesn't necessarily mean you must rush out and book a professional photographer or buy a professional camera.
There was a time when the only way you could create high-impact e-commerce product images was via a professional camera. But the smartphone revolution has brought us many advantages, and crisp, high-resolution cameras are just one of them. When used correctly, these devices can produce stunning ecommerce photography.
You can push your product images to the next level by learning a few simple product photography tips. So, if you want to improve conversions, and build trust and brand identity, read our ten easy tips on taking better ecommerce product photos.

What makes a great product photo
Understanding the fundamentals of capturing great, compelling photographs is essential to improving your product photography. So, what makes a great photograph? A good camera can help you, but only if you know the basics. Some crappy photos have been shot on professional cameras, whereas disposable cameras have captured some amazing ones.
So, it's not (only) about the camera but about knowing what to do with it. The following section will walk you through the basic principles of crafting a great photograph.
Composition
In photography, the composition can mean placing objects in an image, but it can also mean deciding how you want to crop the image. That is, what is shown in the picture and what is left out.
-
Successful composition depends on what you want to communicate with the image.
-
In product-only shots, the intention is to present the product as accurately as possible. So, in this case, it is better to place the subject of the image as centrally as possible and avoid other distracting elements in the image.
-
In a lifestyle picture, you can be more creative with the composition and apply the rule of thirds, for example.
Exposure
Exposure means how much light the camera lets in to form an image and how sensitive the camera sensor is to light. Exposure is determined by the shutter speed, aperture, and ISO. Alternatively, most digital cameras have an auto-exposure mode which means that the camera selects the correct settings for you.
-
The correct exposure level depends on the type and style of the image you're taking.
-
For typical product photos, you want a balanced look where the subject stands out clearly from the background and is well-lit.
-
There's more room for experimentation with lifestyle, and detailed shots as the exposure significantly impact the mood of a photograph and where the viewer draws her attention.
Focus
The depth of field determines what is sharp and what is blurry in the image. When photographing a subject rather than a landscape, photographers aim to include both sharp and blurry areas in a photo. That's because an in-focus subject on a blurry background is one of the most powerful ways to create dynamic images and draw the viewers' attention to the right place.
-
The depth of field is determined by the aperture size and the distance between the camera and the subject.
-
The larger the aperture (smaller f-stop) and the shorter the distance between the camera and the subject, the shorter the depth of field. This style is ideal when you're shooting the finer details of your products and want to blur out a distracting background or other areas of the image.
-
Aim for a longer depth of field when you want to keep the whole subject in focus.
Light
Light is one of the most critical factors that separate excellent pictures from average ones. Light comes in multiple angles, strengths, and colors, affecting the final image's appearance.
-
By positioning the light in front of the subject, it's easier to achieve an even exposure, which is suitable for generic product photos.
-
Softer light helps avoid shadows, while hard light creates strong shadows. A cloudy day is generally better for product shots if you shoot outdoors in natural light.
-
Shooting in a photo studio allows you to adjust the lighting conditions to suit your needs. Artificial lighting will enable you to change the light's direction, strength, and color, among other things. Avoid using the room's lights and use a softbox if needed.
-
Different light sources impact the color of the image. Keeping an eye on the white balance helps you to present the colors as they appear in real life.
Timing
Timing is mainly a relevant thing to consider when shooting moving objects. Think, for example, sports, a moving car, the fluttering hem of a dress, or an object thrown in the air (consider only when not risking harming the product or anyone near you). A photograph enables you to capture movement. It can be powerful in creating stunning, dynamic pictures that catch viewers' eyes.
-
Timing only has an effect when shooting lifestyle images and moving objects.
-
Use the burst mode in your camera to help you capture just the right moment.
-
When shooting movement, use short exposure times.
Tips to improve your ecommerce photography
Alright, now that we have introduced you to the basics of crafting high-quality images, it's time to get into the more practical part of this guide. The following section presents some easy and valuable tips to help you improve your ecommerce product photography.
These tips don't require a huge budget or the finest camera. You can get good results with just your smartphone, some creativity, and a little effort.
1. Make a white background
You've probably noticed that most e-commerce product images are set against a white background. There are a few good reasons for this:
-
It reduces background distraction
-
It provides a sense of consistency across all your product photos
-
Some marketplaces, like Google Shopping, insist on white, gray, or lightly colored backgrounds.
There are lots of ways you can create a white background easily and cheaply.
The most accessible option is to buy a white poster board from your local art store and hang it on a wall. This is a super easy and cheap way to achieve a professional look in product photography, especially when shooting smaller objects, like jewelry or electronics.
A white backdrop might be a worthwhile investment if you shoot a lot or the products you sell are large. We recommend choosing a paper version, not only because they are cheaper, but because backdrops, especially white ones, tend to get dirty. You can simply cut off the dirty part.
If you shoot against a white wall, you will notice that the angle between the wall and the surface (table/floor) forms a shadow. Hang the white poster board or backdrop freely and pull the bottom edge a bit out of the wall to create a soft background.
Note: make sure the background is pure white because it'll help you in post-production.
2. Properly light your set
Lighting is the most critical aspect of photography. Many shoppers will instantly dismiss a product that looks unclear and shadowy. Well-lit product photography looks better and has a positive effect on sales. Next, we'll introduce two ways to light your photographs using natural lighting or studio lighting equipment.
Natural light
The best part of using natural light: it's free. But that doesn't mean you can't take professional product shots in natural light. In many cases, natural light is a better option than studio lighting. For example, people often look better when shot in natural light.
Traditional product shots can also be taken indoors using natural light. Just place your backdrop or table in a bright room near a window. Turning the set relative to the window allows you to experiment with how different angles work to light your product. Finally, avoid direct sunlight.
Artificial light
If you are actively publishing new products in your online store and need to take new product photos regularly, investing in studio equipment can make sense. You can get a basic lighting kit from Amazon for around $100. When buying studio lights:
-
Ensure the lights come with a softbox to avoid overly strong shadows in your images.
-
Ensure the light bulbs' temperature is above 5500 kelvins, equivalent to daylight.
Again, the angle from which the light comes will affect the final result. When using a pair of lamps, one should be your main light, placed in front of the product being photographed, and the other is the fill light, which is used to soften the shadows. The fill light is often placed opposite the main light.
3. Eliminate shadows
Shadow prevention links strongly to the lighting conditions in which you are shooting. For example, using a flash or shooting product photos in the middle of the day can cause shadows—leaving some areas of the image too dark.
While there are some situations where you can use shadows artistically to improve your photography, more often than not, they distract the attention away from the product.
You can do several things to diffuse the light when shooting products.
-
If you're shooting with flash, play around and see if it's better on or off. Use a flash diffuser or a white plastic bag wrapped around the flash to soften the shadows.
-
If you are using natural light, try photographing near a window and adjusting the curtains to diffuse the harshness of the light.
-
Moving the studio lights to different angles, further away or closer to the product, can help you achieve the desired result.
-
Try using white bounce cards to light the product evenly from all sides when shooting with the window light. A white bounce card reflects light from the window, illuminating the darker side of the product being photographed.
4. Use a tripod
It doesn't matter if you're using a professional camera or your smartphone; you need a tripod to ensure you shoot stable, high-quality images. A tripod is a great way to avoid blur if your camera shakes.
Tripods also contribute toward a sense of consistency in your photos. If you shoot on a table or against a backdrop, you can ensure that the products are always shot at the same angle and height.
Tripods come in a range of sizes and qualities. But if you're just starting your online store, you won't need a top-of-the-line model with all the possible adjustments.
There are plenty of entry-level tripods for every kind of camera. If you are using a smartphone, there are lots of options too. Anyone on a tight budget can find a selfie stick with standing legs for just a few tens.
5. Set up your items
Products come in different sizes and shapes, and not every product can stand up independently. Some products can be propped up with a little stand, while others need more. In addition to supporting your products, finding the lighting and optimal angle can take a while.
Place the products to be photographed against the background. Not too close, as this will make the product stand out more against the background.
Products like clothes and jewelry benefit from using a mannequin or a model. However, not everyone has the space to keep a life-sized doll in their house. Thankfully, there are many options, like torso-up dummies or stands designed to display necklaces and pendants only.
Another big plus of using a non-distracting support item is that it helps your customers understand the size of your product. People use other helpful solutions to highlight product size, like placing a general item beside your product in one of the photos.
6. Work your camera angles
Some products are more straightforward to shoot than others. You can stand a lamp up and capture the profile, and it looks great. However, depending on the size, shape, color, or product type, things can be a little more challenging.
To get the most from your product photography, experiment with angles. Different angles, profiles, and close-ups are essential to shoppers because they might not have seen the product in real life. So take photos that show as much of the product as you can.
Additionally, if you display many photos on the product pages, you can test to see which angles and styles your customers like best. Many e-commerce platforms allow you to access a variety of metrics. So, A/B test your product photos by serving customers with various looks and seeing which images lead to increased engagement.
Don't worry if you're just starting and don't have sophisticated analytics tools. You can do your A/B test over the course of a few weeks. For example, use a specific photo or angle in week one, and change it up in week two. Then compare sales, clicks, or other engagement to decide which option is better.
Tip: Most new smartphones can take 360 photographs. However, to achieve the effect, you'll need a turntable. Like with everything, you can go out and spend as much as you want on a turntable, or you can find a basic version on Amazon for $20-$25.
Armed with your entry-level turntable, you can take 360° photography and upload it to your e-commerce platform as a GIF.
7. Experiment with lifestyle photos
While most of our tips have been about creating clean, crisp product-only images that display well on your marketplace, different types of ecommerce product photos bring out the best in different products. For example, certain products look better in the environments your customers will use them.
While we'd still recommend that the bulk of your photos be shot against a seamless background, consider mixing in a few lifestyle images where appropriate.
Clothes and jewelry are obvious examples of products that benefit from being shot in context. Still, items like consumer electronics, sports equipment, and power tools can get a boost in the right circumstances.
Additionally, you can create a richer, more emotional narrative around your product by showing products in the context. For example, a sleek laptop in a coffee shop setting, a close-up shot of a ring on a hand, or a model wearing your clothes can help engage your customers. Moreover, they are an excellent opportunity to tell your brand story on your social media accounts.
8. Use photo editing software
It's not a secret that most of the best e-commerce product photos you see have been edited and processed in post-production. Sometimes it's just minor things like cropping the image to achieve consistency across your website. Other times the retouching is more advanced, like color correction, adjusting the lighting, and removing unwanted objects.
Whichever ecommerce photography look you want to achieve, photo editing software can help. If you're unfamiliar with this technology, you might worry that it'll be expensive and challenging to learn. But luckily, there are lots of accessible and user-friendly options on the market to help you produce mint product photography.
Some of the best image editing tools for ecommerce photography are:
Adobe Photoshop Express: This intuitive app is free to download onto your smartphone and desktop, and it has excellent editing and color correction alongside a range of filters. The free version is limited, but you can upgrade to a yearly membership that costs $4.99 per month with a first-year offer of $9.99.
Adobe Lightroom: Adobe Lightroom is a fantastic option for online stores that need professional-level photo editing tools but still value an easy and clean interface.
Photos upload quickly, and it even has artificial intelligence capabilities that allow you to search your images for specific tags. One of the best features of Lightroom is that you can save your presets and edit photos in bulk.
It's a little pricey at $9.99 per month, but it could be a great solution if you have a lot of products.
Canva: Super simple and easy-to-use graphic design software. With many ready-made templates and designs, Canva makes it quick to create images and other visual assets for your website and digital channels.
Canva also offers an extensive stock image and asset bank, and useful tools like background remover and image resizer, making creating images even faster. It's not an overstatement that Canva makes design fun.
Canva offers free and Pro versions. The paid plan costs $12.99/month.
Inkscape: Inkscape is a free computer-only app. It allows users to edit images and write text onto their photos. Adding text overlay can be particularly useful for e-commerce stores if you want to add sizes or specifications to your product images.
It's very user-friendly, and you'll quickly pick up the basics. One potential drawback is that it can be a little slow in image processing, but it has a loyal and happy user base, so it must be doing something right.
Picsart: Picsart is an online editing and AI photo-enhancing tool that’s incredibly user-friendly. You can remove backgrounds, create AI-generated images, and swap parts of your photos with a single click. You also get to pull from its immense gallery of stock images and assets. Picsart has a free version and two paid versions: Gold at $5.50/month and Team at $5.13/month.
9. Optimize images
In addition to the high-quality product photos, other things affect the success of your ecommerce store. One of these things is the search engine friendliness of your site.
As one of the key ranking factors on search engines is the performance and speed of your website, you want to make sure the image file sizes are optimized as small as possible without sacrificing too much quality.
-
First, ensure that the image size is not significantly bigger than the display size on your website. Adjust the width and height accordingly, and set the pixels per inch to 72.
-
File format matters. Prefer JPG or WebP.
-
Name your files descriptively and add alt-attributes to them.
-
Finally, you can use one of the several image compression tools available online. Image compression tools minify the file size by removing data that does not affect the image quality to such an extent that a human eye would notice the difference.
10. Get familiar with your camera settings
It helps a lot in taking better photos if you know the basics of how a camera works and how to use it. While every camera is a little different, general guidelines apply regardless of the camera model.
-
Set the image quality setting to the highest possible. Choose RAW if your camera supports it. Otherwise, choose the largest JPG setting that your camera supports. Note that with RAW files, you need access to image editing tools that support RAW files.
-
Set the ISO to the lowest possible. ISO refers to the sensitivity of the camera sensor. Typically you want to keep it as low as possible because high ISO creates noise.
-
Set white balance to 'Auto' or the same kelvin value as your lights.
-
Manual exposure settings give you the most control if you're shooting in stable lighting. This is often the best option in product photography. Your lens's sweet spot, aka sharpest aperture, is typically two to three stops up from the widest aperture (lowest f-stop). For more depth of field, increase the f-stop until the whole object is sharp. On the other hand, lifestyle shots can benefit from a lower depth of field and blurry background.
The higher the f-stop you're using, the longer exposure you need. Exposure is expressed as a fraction of the time the shutter releases light onto the camera sensor—for example, 1/60 of a second. Adjust the exposure until your image looks good.
-
Zoom in only if you have optical zoom in your lens. So, for example, avoid using zoom when shooting with a smartphone.
-
Pick up the right lens. E-commerce photography needs to be as accurate as possible. A wide-angle lens distorts the image, so use a telephoto lens to present your products as true to life. A lens with a focal length of 50mm or more will do the job.
Progress to the next level
The previous ten tips showed you how to improve your ecommerce product photography without too many skills or a huge budget. However, there's no need to stop there.
Photography is like any other skill. You'll want to practice, keep learning, and get better equipment. Investing in a good camera and other equipment is the obvious way to improve your ecommerce product photography.
When you've locked down the basics, you can also study more about the craft of photography, like composition and color theory.
Remember, practice makes perfect.